Azure DNS Zones Setup
Step 1: Purchase or Keep Your Domain with a Registrar
Because Azure doesn’t function as a registrar, your domain must live with a third-party registrar.
For new domains, purchase from a registrar (e.g., Namecheap, Route53, GoDaddy, etc). For existing domains, they can stay with their current registrar.
The only requirement is:
You must control the domain and be able to modify its name servers.
Step 2: Create an Azure DNS Zone
Inside Microsoft Azure:
- Create a new DNS Zone
- Name it exactly your domain (e.g.,
example.com) - Deploy it to your resource group
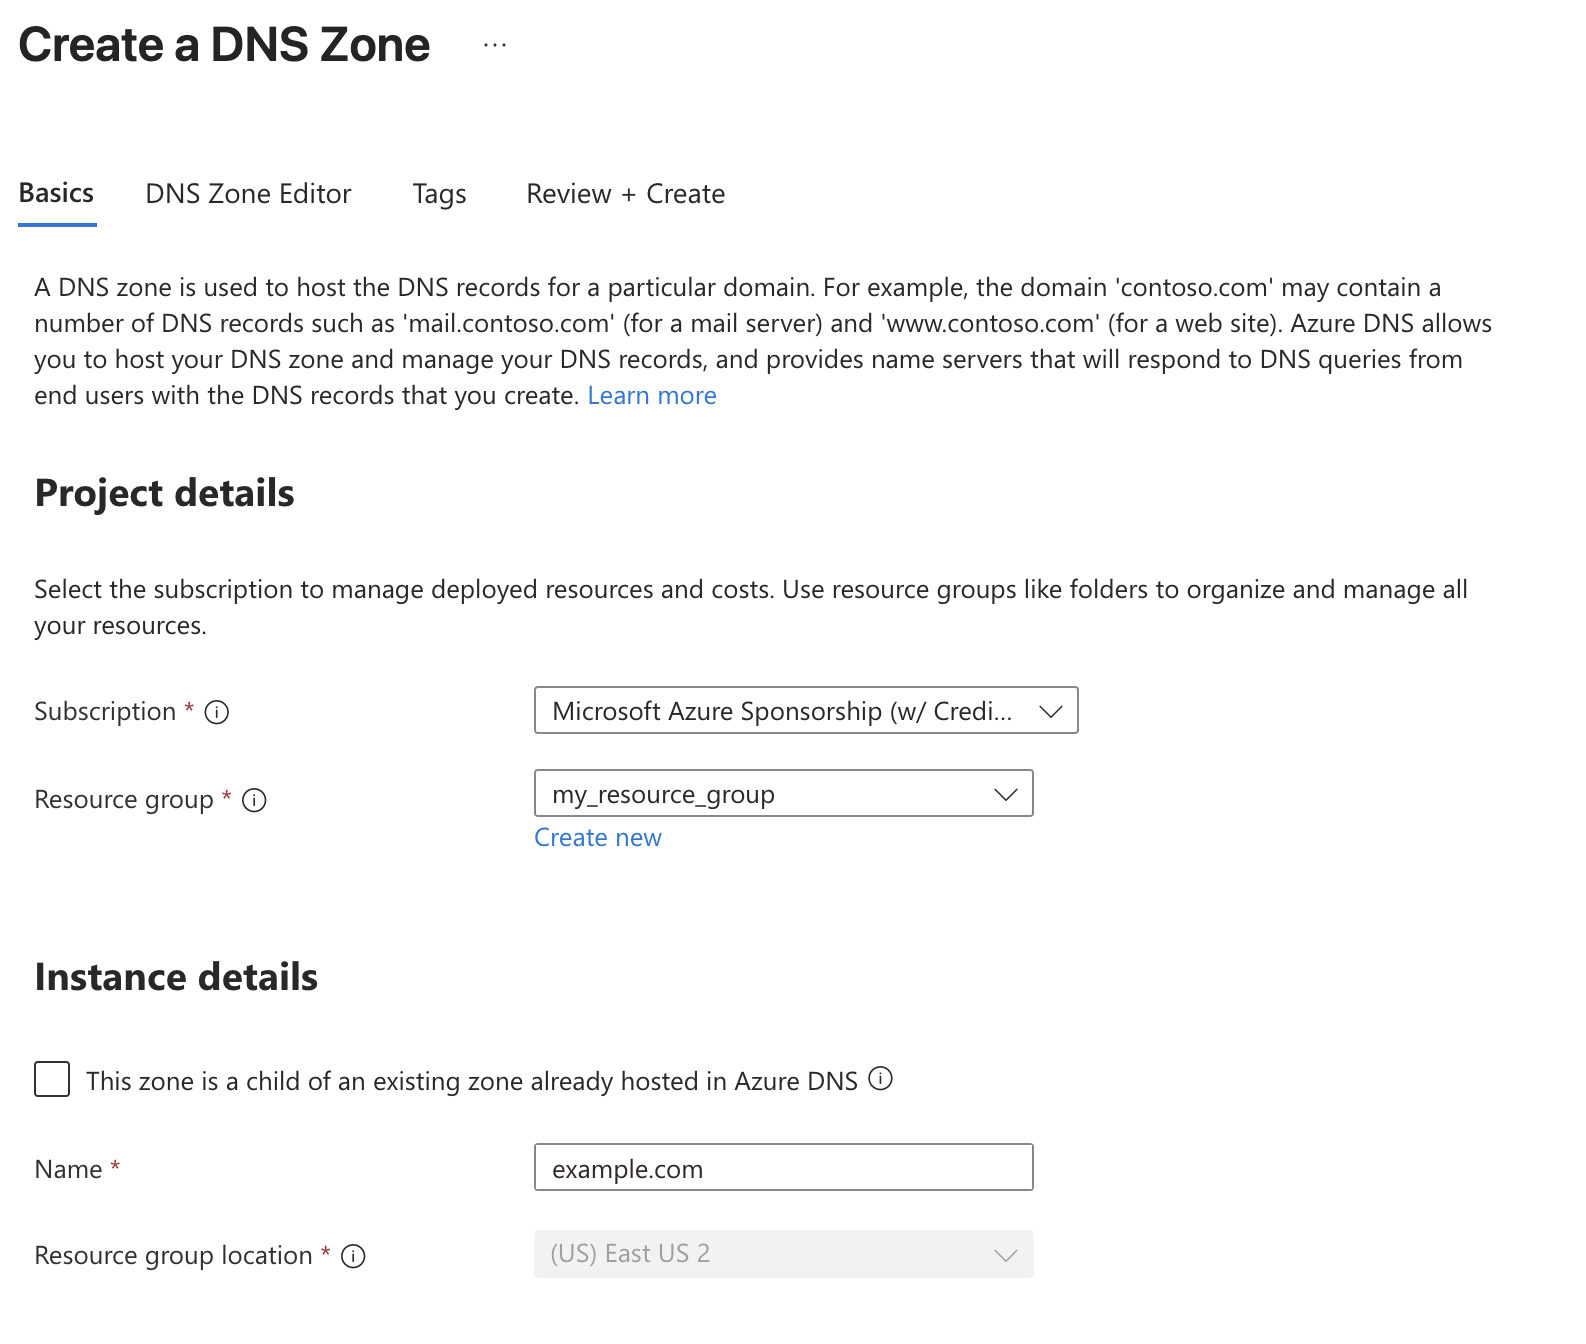
Note that existing DNS records can be bulk imported from an export with your current registrar (which vastly reduces the potential for human error):
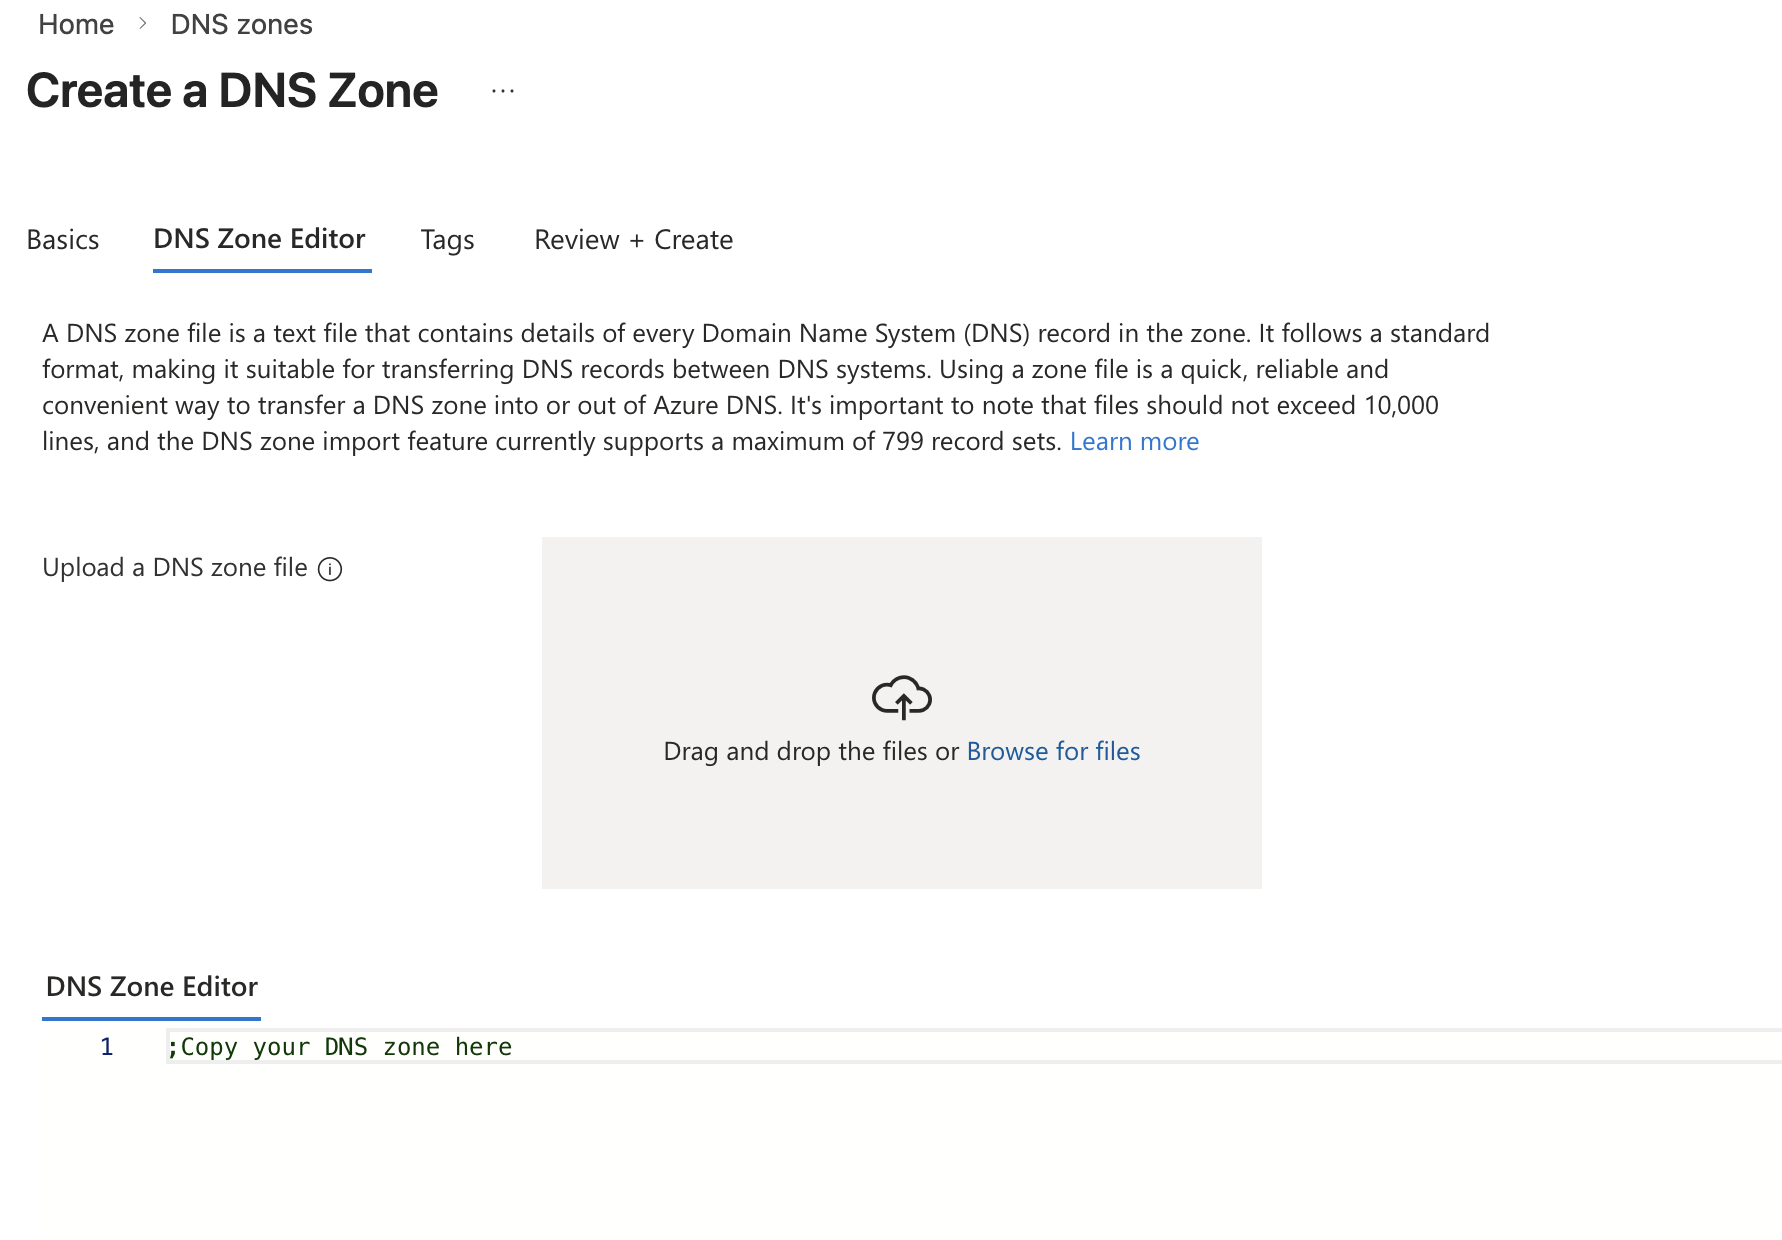
In this case, we’ll skip this as we’re using a brand new domain and will add additional routes progressively.
Once created, Azure will assign a set of Name Server (NS) records to that DNS Zone.
These look something like:
ns1-xx.azure-dns.com
ns2-xx.azure-dns.net
ns3-xx.azure-dns.org
ns4-xx.azure-dns.info
These are critical for the next step.
Step 3: Point Your Domain to Azure
Now go back to your registrar (e.g., Namecheap, GoDaddy, etc).
Replace the existing name servers with the Azure-provided NS records.
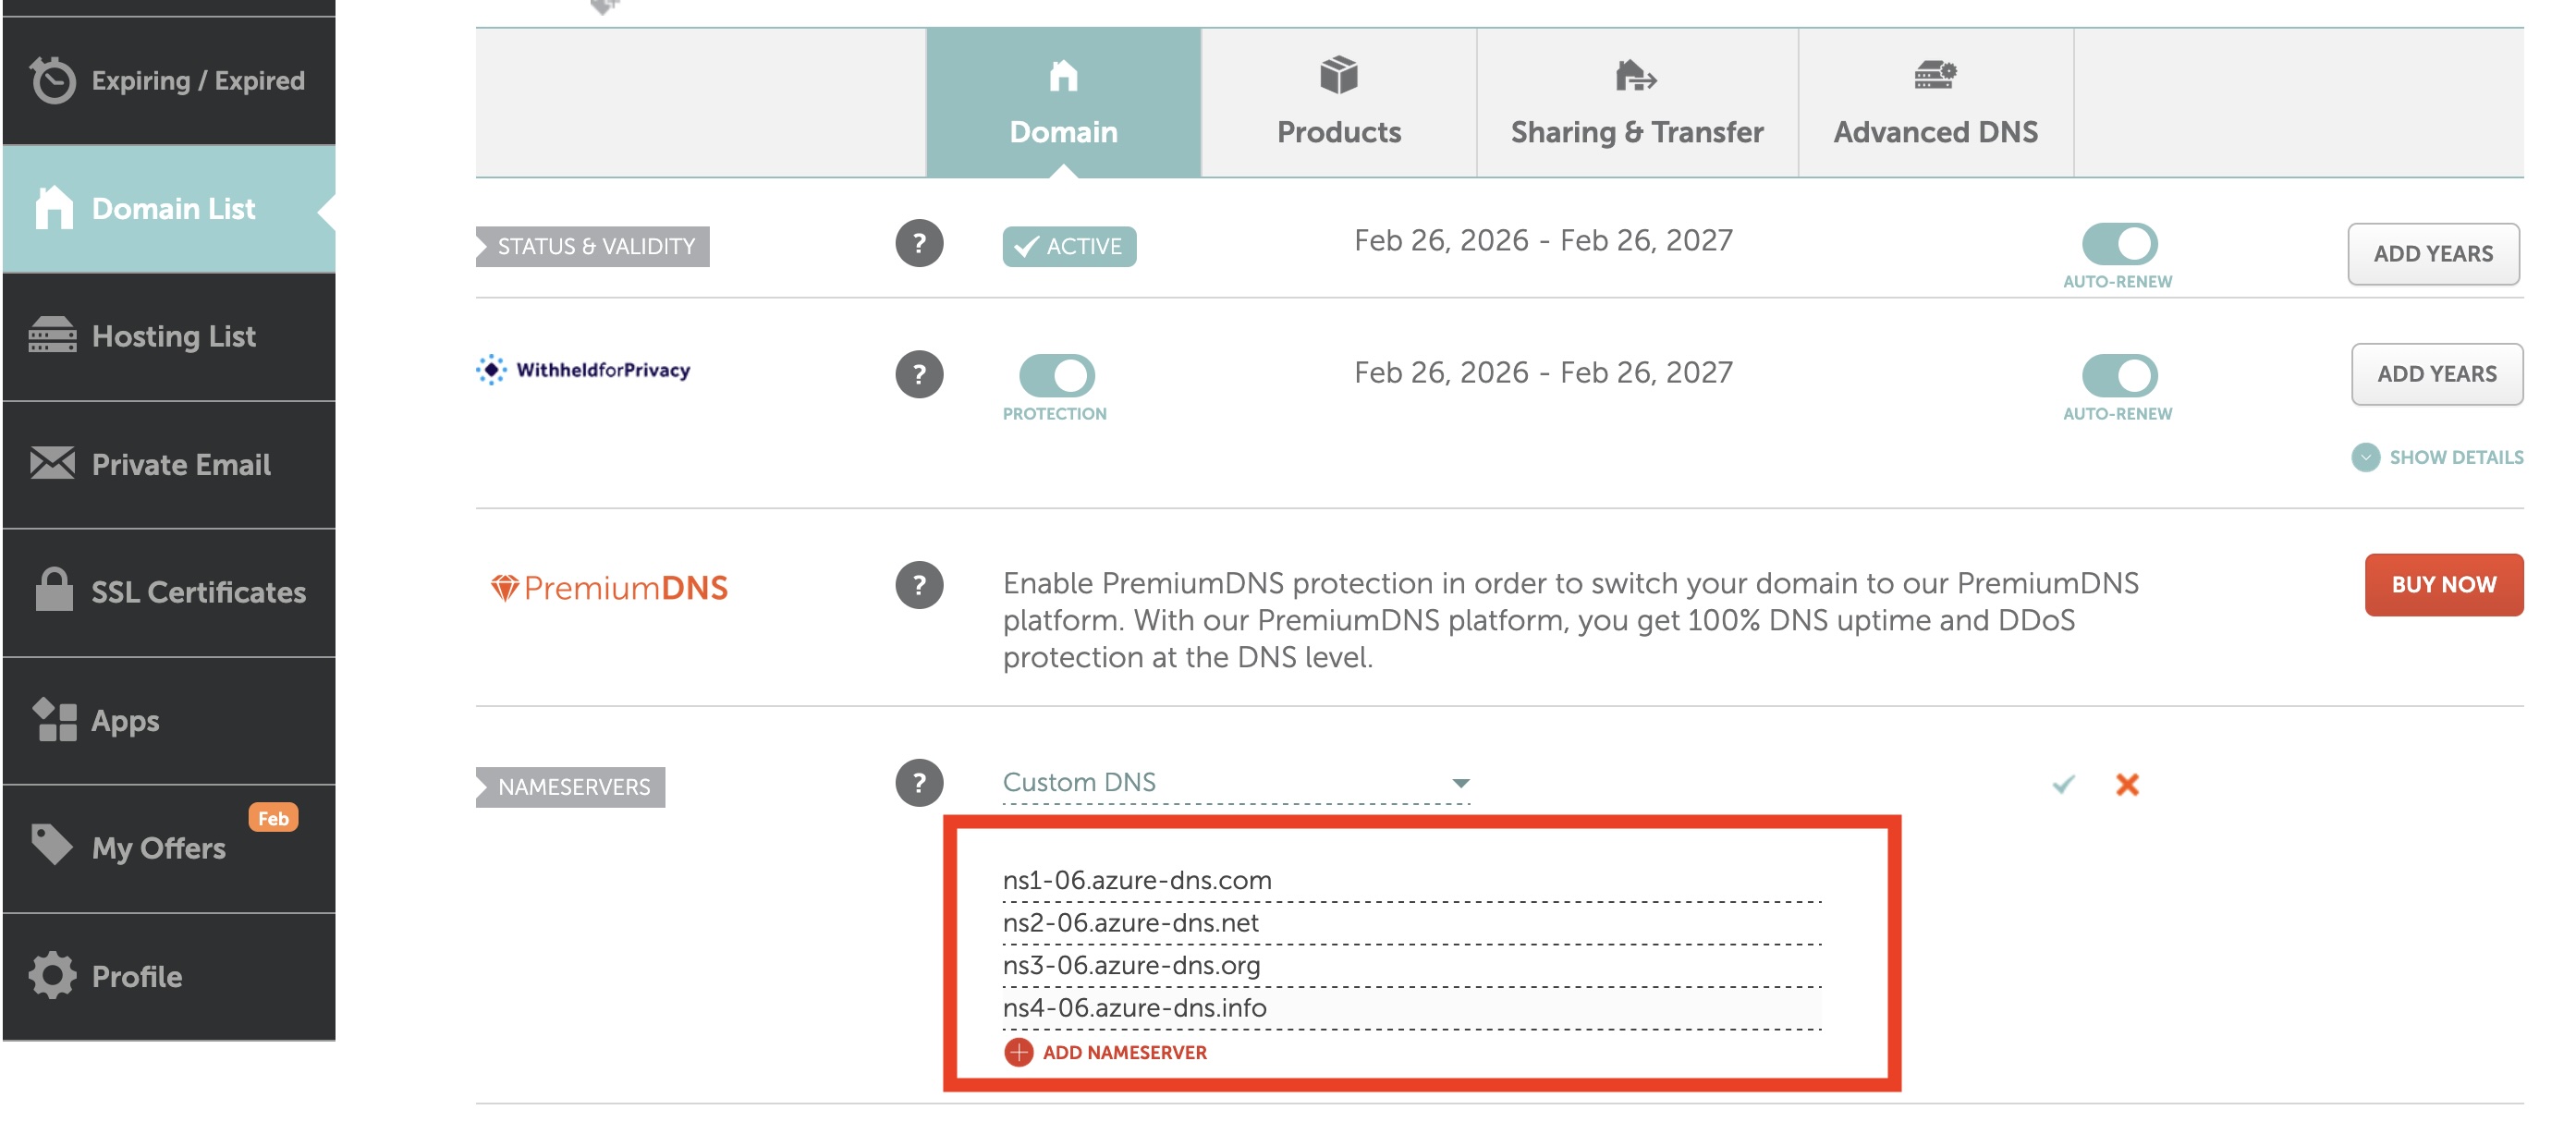
This effectively tells the internet:
“Azure is now the authoritative DNS provider for this domain.”
DNS propagation may take anywhere from minutes to 24–48 hours depending on TTL and registrar behavior.
Once propagation completes, Azure DNS becomes your source of truth.
What Azure DNS Actually Gives You
After delegation:
- You manage A, AAAA, CNAME, TXT, MX, and other records directly inside Azure
- Azure services can automatically validate and attach custom domains
- You can manage DNS records alongside your Azure infrastructure
- Infrastructure-as-code becomes easier (Bicep/Terraform)
Azure DNS does not host your site — it only resolves domain names to services.
How This Fits Into the Migration
The actual usage of DNS records will be covered in the relevant service chapters covering:
- Static Web Apps
- Azure Web Apps
- API services
- Email configuration
Each Azure service typically instructs you to:
- Add a TXT record for domain validation
- Add an A or CNAME record for traffic routing
Because your domain is now delegated to Azure DNS, those records can be managed centrally inside your Azure environment.
AWS vs Azure DNS at a Glance
| Capability | Route53 (AWS) | Azure DNS |
|---|---|---|
| Domain registration | Yes | No |
| DNS hosting | Yes | Yes |
| Deep platform integration | Yes | Yes |
| Managed in cloud console | Yes | Yes |
Final Takeaway
DNS migration is straightforward (but high risk, so needs to be executed carefully):
- Keep your domain at a registrar
- Create an Azure DNS Zone
- Delegate your domain to Azure
- Manage records inside Azure going forward
That’s all. From here, the rest of your Azure migration builds on top of this foundation.
Enjoying this migration guide?
Get notified when new chapters are published. No spam, unsubscribe anytime.